


Table of Contents
Heads up: If you have any concerns regarding your gutters, you should always see a professional. When working on your gutters, make sure you are aware of and follow all applicable ladder safety procedures. If your gutters are too high for a 10-foot ladder, don't bother fixing them. Using an extension ladder is not allowed. Never stand on a ladder without having someone else there to notice you. Keep off the roof at all costs. Do not attempt to clean your gutters if the weather is too wet, windy, or cold. If you live somewhere cold, the chances are good that you've come across the phenomenon of an ice dam in your gutter. These ice chunks could form in your gutter at first, and then slowly make their way up onto your roof. There are gutter solutions that may prevent ice dams from forming, in addition to ice and water protector, which can protect your roof from the effects of ice dams.
In this post, we will explore which kinds of gutters are most suited for use on roofs in areas that see a lot of cold weather, as well as how you should clean your gutters so as to avoid ice jams from developing before winter arrives. We will also go over how to mend gutters that are drooping and how to address leaks in gutters. In the event that your preventive measures are ineffective, and an ice dam forms on your roof nevertheless, we will also demonstrate how to remove the ice dam without causing any damage to your gutters or roof.
An Overview of the Various Gutters
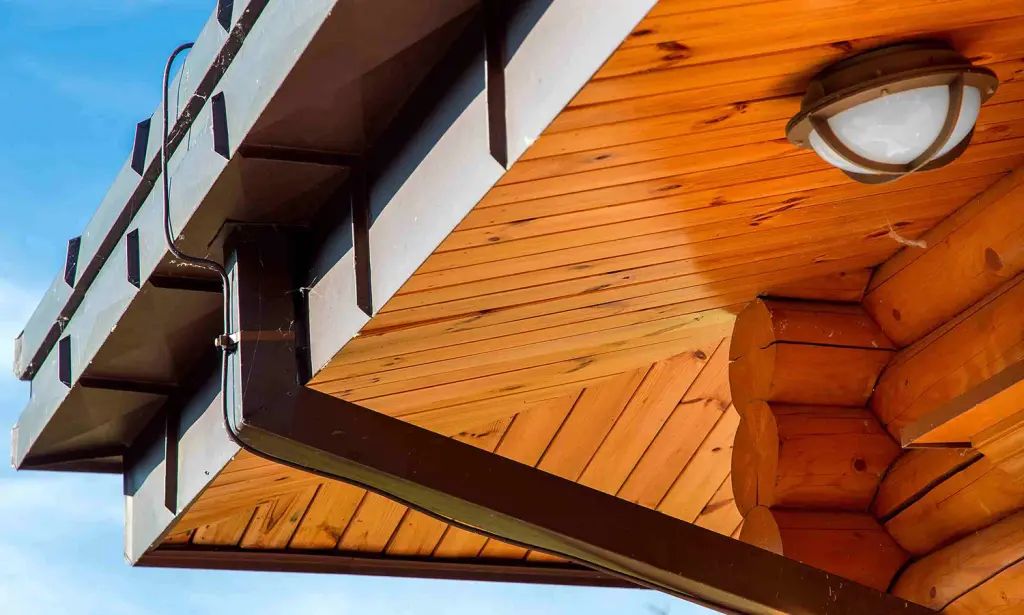
Guttering is a crucial part of every roof. You should know whether or not they are seamless, as well as the material they are made of, the dimensions of their form, and the shape of their size. In this section, we'll discuss the many gutter choices available to you.

There are three main gutter types or shapes:
Half-round gutters

Resemble circular tubes that have been chopped in half. They used to be a common gutter form, but they've gone out of favor. Half-round gutters are less expensive than other forms, however, they are ineffective. In reality, they barely store half the amount of water that a K-style gutter can. However, half-round gutters may still be seen on older houses.
K-style gutters:

K-style gutters feature square bottoms and a flared side. From the exterior, they resemble crown molding. K-style gutters contain more water than half-round gutters and are hence a superior option for cold-weather residences. They may range in width from 5 to 8 inches.
Fascia-style gutters with broad bottoms:

Some house types are incompatible with K-style gutters. Fascia gutters have a flat bottom like the fascia, but their outer edge is straight, replicating the appearance of the flat fascia behind them. Furthermore, by having a flat outer edge, these gutters may be made thinner, making them stand out less. In colder climates, fascia-style gutters are more popular. However, they may not always outperform K-style gutters in cold weather. Wide bottom gutters are unnecessary unless you experience severe storms or have an extremely big roof.
Gutters are also constructed differently:
Sectional gutters:
Sectional gutters are common in homes. They come in short lengths that click together during installation. Each seam where two gutter lengths meet is a weak area that may eventually leak or sag. Sectional gutters, on the other hand, are quicker and easier to install.
Seamless gutters:
These gutters have no seams and are continuous. Instead, they are custom-cut to the precise size required for the residence. Corner pieces may be joined by soldering or screwing. As a consequence, there are no weak points where a leak will certainly form. In colder climates, seamless gutters are preferable because leaky seams might freeze and drive the whole gutter apart. These gutters, however, are more costly and complex to install.
Gutter manufacturers employ a variety of materials to make their products, including:
Plastic/vinyl: Vinyl gutters are popular because they are the least priced and simplest to install. However, vinyl has a number of disadvantages. It's a flimsier material that can't withstand much stress. You can't put your ladder up against vinyl, which might be an issue while cleaning your gutters. Vinyl is temperature sensitive. In cold temperatures, it compresses, making it weaker and more prone to cracking than other materials. Vinyl gutters are usually sectional, with especially weak joints. They are also only available in a few colors, albeit those hues may complement your vinyl siding perfectly. If you live in a cold environment, you should replace your vinyl gutters every 10 years. You may need to replace your gutters more often or less frequently depending on how effectively they perform on your unique property in your specific environment. Nonetheless, their modest cost may make the replacement worthwhile.

Aluminum gutters: an upgrade from vinyl gutters.
They are stronger and do not rust, although they may corrode if not treated to prevent corrosion. In colder areas, heavier gauge aluminum gutters, 0.32 inches or 0.27 inches, are required to withstand the weight of snow. Furthermore, unlike vinyl, metal gutters may be seamless and painted. Aluminum gutters are adaptable and may be used with any kind of house exterior. Aluminum gutters are more durable than vinyl gutters. Nonetheless, they may be dented by ladders or other events, such as falling branches. They are also somewhat pricier.
Steel: a fantastic alternative if you require a stronger gutter. If you reside in a location where hurricanes may blow various types of debris against your property, steel gutters may be preferable. To withstand corrosion in moist environments, steel gutters must be galvanized. If you live in an extremely humid or salty environment, you may need to reapply a protective coating every five years. Steel gutters are also more costly than aluminum gutters. They may be seamless. Corners are frequently screwed together rather than soldered.

Copper gutters: the strongest and most secure option, but they are also the costliest. They are always seamless, with soldered corners. They will not corrode, droop, or bend under the weight of your ladder. They may, however, corrode. Copper gutters are popular among homeowners, although they may not suit all house layouts. Furthermore, they are costly, and their weight makes installation problematic.

Wood: Wood is an old-fashioned gutter material that few contemporary dwellings can use. Wood gutters are not only pricey, but they also leak and deteriorate quickly. Historic homes may have wood gutters.

The Individual Parts of a Gutters System
Gutters alone will not keep water away from your property. Instead, they are a component of a system.

This system's components are as follows:
End caps -These flat caps prevent water from draining from the gutters.

Gutter hangers - also known as fascia brackets, are used to secure the gutter to the wall. There are several styles that work for various types of fascia or gutters. Some are fastened onto the fascia or side of the house and serve as a platform for the gutter. Others grip the top edge of K-style gutters rather than looping around them. More information on gutter hangers may be found later on this page.

Downspout - A downspout, also known as a leader, is a conduit that permits water to flow from the gutter and onto the ground. Half-round gutters need circular downspouts, whereas K-style gutters require square downspouts.

Downspout brackets - are basic aluminum or metal brackets that wrap around a downspout and fasten it to the side of a house. They might be just cosmetic.

Elbow/Boot - A little length of pipe at the end of the downspout bends like an elbow (or that looks like a boot). This segment of pipe is intended to divert water away from the home's foundation. Gutter boots may be attractive as well.

Downspout extension - A home's slope or the landscaping around it may divert water back to the foundation. To prevent this issue, install a downspout extension to move water farther away from the house and past problematic slopes.

Gutter downspout diverter - During severe rains, water may stream out of downspouts rather fast, damaging the landscape. To prevent this issue, install a downspout diverter immediately beneath the boot. It's a fan-shaped piece of plastic, concrete, or metal that spreads out the water, reducing its effect.

Gutter guards: They are screens that sit on top of your gutters to prevent leaves and other debris from falling in. A variety of gutter guards are available, including meshes and solid panels that leave very little space for water to enter.

The Different Types of Fasteners Used on Gutters
Your gutters are only as robust as the fasteners that hold them together. Furthermore, with various kinds of gutter fasteners provide the roof distinct aesthetics and may improve the exterior appeal of your property. Here's an overview of all the many kinds of gutter fasteners, as well as a comparison of common varieties to help you decide which one is best for your gutters and roof.
Gutter fasteners are classified as follows:

1. Spikes and ferrules: There are two parts to this system. The spikes are long screws or nails. Ferrules are little metal tubes.
To begin, a roofer drills two holes in the top of the gutters and inserts the tube through the holes. The roofer next pushes the nail or screw through the tube and into the roof fascia. Spikes and ferrules are an earlier form of gutter fastener that has gone out of favor due to the visibility of the nail or screw head from the outside and their tendency to work loose over time. For half-round or K-style gutters, spikes and ferrules may be utilized.
2. Exposed bracket and strap: An exposed bracket is one that can be seen from the outside. This system's bracket wraps around the base of the gutters. The fastener is held to the fascia by a connecting strap. While this method has numerous benefits, one problem is that when the gutters are cleaned, they might be knocked out of position.

3. Hidden hanger: Also referred to as seamless gutter fasteners. If you appreciate the aesthetic of seamless gutters, the concealed hanger gutter fastener is probably for you. A bar within the gutter clamps onto the outside edge of this mechanism. Nails or screws are used to secure the bar to the fascia. From the exterior, these gutter fasteners are invisible.

4. T-bar/T-strap gutter fasteners: T-bars and T-strap gutter fasteners are not attached to the fascia. A roofer will instead attach them to the roof deck. The gutter is held in place by the bar within the gutter. This bar is hung from a longer strap that extends all the way to the ceiling. These gutter fasteners are designed for use on eaves or on older houses with no fascia or ornamental fascia. However, using them is not recommended since they might interfere with the roof system if not placed correctly.

5. Rise and fall brackets: These gutter fasteners are affixed to masonry walls rather than the roof deck or fascia. A roofer or mason must push or mortar them into the walls. After that, they may be moved up and down to enable the roofer to install the gutters at the proper angle.
Ferrules vs. Gutter Clips
Spike and ferrules are an outdated gutter fastening technique that most roofers dislike. In the winter, old spike and ferrule systems were susceptible to the freeze-thaw cycle. Gutter materials may expand when it is cold and contract when it is warm. This action gradually removes the nails from the fascia. However, gutter ferrule screws that can handle this pressure are now available.
Nonetheless, most roofers now choose gutter clips as a fastening since they are more secure, particularly in colder areas. The clip connects to the inside of the gutter, on the outer gutter edge, allowing most current gutter fasteners, including concealed hangers, to be used.
Hidden Hangers vs. Exposed Fasteners
Should you use concealed hangers or visible fasteners? The issue is mostly one of aesthetics. Many homeowners like the appearance of concealed hangers and seamless gutters. Some historical residences or architectural styles, on the other hand, may call for exposed fasteners that showcase pricey materials such as copper or beautiful engravings. Unless your roofer offers any insight into which fastener type would function best in your given situation, go with what you believe looks best.
Materials and Sizes for Gutter Fasteners
Once you've decided on a gutter fastener type, you'll need to choose the appropriate size and material. Gutter fasteners will indicate you what size gutter they are supposed to be used with, so picking the proper size should be straightforward. This is particularly crucial for K-style gutters, which have a complicated form that prevents a slightly different size fastener from fitting.
Fastener material should match the material of your gutter. Steel fasteners should be used on steel gutters, while copper fasteners should be used on copper gutters. Galvanic corrosion may occur when metals are mixed. One metal may gradually deteriorate, which may need the replacement of your gutters sooner than expected.
When it comes to the fasteners for my gutters, should I use nails or screws?

Some gutter fasteners include screws or nails for use with them, whereas others do not. Which should you choose if you have a choice between nails and screws? Roofers often use screws rather than nails to install gutters. Screws have a stronger grip, which allows them to remain in place longer and withstand pressure from heavy gutters.
If you're fastening your gutters to a wooden fascia, use wood screws. The screw should be long enough to fix itself in the wood but not so long that it pops out the other side. Spike fastener gutters, for example, may need extra-long screws.
Before you make your final decision, consult with your roofer for his or her expert advice on which product to employ. When employing rise and fall brackets, nails are sometimes a preferable option.
The Reason Behind Ice Accumulation on Gutters

Ice accumulation is caused by slow-running or blocked gutters. The rationale is straightforward. Have you ever kept a little amount of water flowing to protect the water in your pipes from freezing during extremely cold weather? We do this because freezing rushing water requires significantly lower temperatures than freezing standing water. Water normally runs through your gutters and hence seldom freezes until it reaches the ground.
Your gutters, on the other hand, are more prone to freeze if they drain slowly. Standing water in your gutters as a consequence of a blockage will freeze as soon as temperatures fall below the freezing mark.
Damage to the Gutters Caused by Snow and Ice

Because water expands when it freezes, it may press out sectional gutter seams and cause further fractures. Ice and snow are both heavy, and too much of either may cause gutters to droop, gutter brackets to buckle, and the whole gutter system to collapse. Even minor changes in the slope of the gutter might exacerbate drainage issues. Furthermore, drooping or iced-over gutters are unsightly and might reduce the value of your home. Gutter corners and connectors are particularly sensitive to snow and ice damage.
Do Ice Dams Form Because of Gutters?
It's simple to understand how gutters may lead to an ice dam. Water cannot flow correctly off the roof if your gutters become blocked or sluggish to discharge. As a consequence, more and more water accumulates on your rooftop, where it may freeze when it reaches the ice dam, exacerbating the situation.
However, the majority of ice dams are caused by insufficient attic ventilation and insulation. Poorly draining gutters worsen the problem.
Will removing the gutters prevent ice dams?
It all depends. If your ice dam is caused only by clogged gutters, clearing them may be beneficial. However, gutters are required in the majority of North American jurisdictions. It could be a better idea to replace your existing gutters with ones that are more suited to your environment. High gauge K-style steel gutters are an excellent option.
Furthermore, gutters are seldom the source of your ice dam issue. In most cases, installing sufficient attic ventilation is your greatest choice for preventing ice jams.

There are a few more things you may take to prevent ice dams, such as:
Installing an ice and water protector to prevent damage.
Regularly and thoroughly clean your gutters.
Make sure your gutters are appropriately sloped so that there is no standing water.
When and how often do you clean your gutters?
In general, your gutters should be cleaned twice a year. Once in the spring and once in the late autumn, soon after the trees' leaves had fallen.
Why Should Gutters Be Cleaned Before Winter and Spring?

Autumn leaves will fall in cold-weather climates. Some of them will end up in your gutters. These leaves are more prone to block the drain. If not, they will still slow the flow of water from your downspouts. Both issues will contribute to ice jams in the winter. Cleaning out the gutters before winter is considerably simpler than attempting to melt an ice blockage after it has developed.
Most homeowners in snowy regions clean their gutters before spring to guarantee that their gutter system can withstand the torrential rains that will fall in the coming weeks. In fact, homeowners living in warm-weather areas should clean their gutters before hurricane season to give their gutter system the greatest chance of surviving the storm. Of course, you'll want to clean them afterward to eliminate any material carried into the gutters by the heavy winds.
Dirty gutters in the spring may produce mold or host insect and animal life during the summer. Water may also back up from the gutters onto the roof, producing a leak or rotting the wooden fascia behind the gutters.
There are a few additional reasons why you should clean your gutters more frequently:
You have tall trees, particularly evergreens that drop needles into the gutters all year.
You notice that your system becomes blocked quickly.
Your gutters are clogged or leaking.
You may reduce the frequency with which you clean your gutters by trimming your trees, installing a gutter system composed of more weather-resistant material, such as steel or copper, or installing gutter guards.

What Is the Best Way to Clean Gutters?
Here's how to clean your gutters:
1. Clear away any leaves and debris.
A ladder, gloves, and a mechanism to collect the debris are all required. Some individuals use a bucket, while others place a tarp next to the home and drop the trash on it. Before you begin, get acquainted with ladder safety.
You may use an extended gutter cleaner or a leaf blower with a gutter cleaning attachment if you want to remain on the ground. However, if you want to check the gutters, you'll need to climb a ladder.
While most people feel that cleaning the gutter with their hands is the most effective method, there are a few other pieces of equipment you may use if you prefer. A plastic spatula or scoop would suffice. If you discover material caught in a clog, use a professional to clear it out since removing a blockage might destroy your gutters.
2. Remove Mold and Algae
Mold may grow in slow-draining or blocked gutters because they are always damp. Mold may erode the protective coating on your gutters or make its way into your home, so it's best to wipe it up. Water flow is restricted by algae. Scrub away any visible mold and algae with a bleach solution and a sponge. Any bleach-based home cleanser will suffice. Remember to wear your gloves for this step!
3. Get Rid of Rust
You may be able to remove rust from the outside of your gutter system using a scouring pad or a rust-removing cleaner. Rust is more than simply an aesthetic problem. It may cause your gutters to deteriorate. You will eventually have to repair the gutter pieces where rust has formed. When doing so, consider using a less corrosive gutter material, such as aluminum or copper.
4. Examine Performance and Look for Leaks
Your gutters should flow smoothly now that they are clear of dirt, mildew, and rust. Fill the gutters with water using your yard hose. Check that the water flows freely from each downspout. It's also straightforward to check for leaks while doing this. Examine the complete gutter system. On sectional gutters, pay close attention to the seams. Use high-visibility tape to mark the leaking areas.
You must now plug the leaks that you have discovered. If you have a few leaks, it may be time to replace your gutter system entirely. However, tiny leaks, particularly those near seams and end caps, are manageable.
How Do You Stop Gutter Leaks?
Here's how to repair gutter leaks:
1. Select the Material You Will Use
To seal vinyl, aluminum, or steel gutters, you'll need caulking, preferably one that's specifically intended for gutters, so you can paint over it later to match the gutters. Avoid using silicone caulk since it cannot be painted or redone. Consider butyl rubber, urethane, or polymer-based caulking instead.
If you have copper gutters, it is best to have them repaired by a professional. Copper gutters are a long-term investment, and sealing them is merely a temporary fix. Copper gutters may be soldered by a professional to seal seams and repair holes.
2. Clean and dry the gutters
Clean up your gutters to get rid of any debris around the leaks. Then, wait for the gutters to dry before attempting to fix the leaks, otherwise the caulking may not apply or dry properly. Wait for sunny weather for the same reason.
3. Remove Old Sealant
You'll need to remove any old caulking around the leak, particularly if it's at a seam. Spray the old caulk with caulk remover and wait for it to soften. Then, using a utility knife or other sharp instrument, scrape it off. A bleach solution may also be required to eliminate adjacent mold or dirt.
4. Use Caulking
Trim the caulking tube's tip. Fill a caulking gun with the tube and apply it to the hole. When working at a seam, put the caulking first in the seam, then around it. Make an effort to cover the seam or hole in a single, straight sweep. Apply only as much as is required to cover the leaking area. However, be sure to read and follow your caulk manufacturer's recommendations about the minimum diameter of caulking you must apply.
How to Look for Structural Damage in Gutters
Gutter performance may be impacted by factors other than debris and corrosion. Structural deterioration might also be harmful. Here's how to check your gutters for structural issues:
1. Examine for Sagging
Look around your house for any portions of the gutter that seem to be sagging. Sagging is most often seen at seams when the bottom of the seam pulls away. Sagging gutters not only look awful, but they may also develop jams or have an uneven slope that inhibits water from draining correctly.
2. Examine for Dents
Walk around your house again, this time checking for gutter indents. Dents reduce the capacity of your gutter system and make it more vulnerable to future damage. Dented gutter portions will need to be repaired or replaced.
3. Determine the Gutter Angle or Slope
Gutters may seem perfectly level, but they really slope slightly towards the downspout, ensuring that no standing water accumulates. Your gutters' tallest point should be just 5/8 of an inch higher than their lowest position, which should be where they join to the downspout. You must measure since this little grade is almost difficult to notice. As a guide, measure the slope using a thread. If you're not sure how to accomplish this, we've got you covered. Just keep in mind that each piece of gutter should slope down to the adjacent downspout. Make use of an adjustable level to double-check your work.
Realigning Gutters
If you discover that your gutters are level or improperly slanted, they must be corrected. Because this task requires the use of power tools at height, it is best left to a professional. If you're still wondering about the procedure, here's how the expert will realign your gutters:
1. Make a Guide
The specialist will first draw a chalk line to demonstrate the angle at which your gutters should be installed. To do this, they may tie a string to the highest point of the gutter's attachment to the fascia, which should be the end cap furthest from the downspout.
The expert will begin their measurement at the direct center of a portion of gutter that feeds into two downspouts, as seen in the figure below (also shown). The right side will slope down to the right downspout, and the left side will slope down to the left downspout. Each downspout will be utilized in this manner.
They will stretch the string all the way to the downspout and lower it by 5/8 inch. They may snap a chalk line once this line is secure. They will plan out the whole gutter system using this way.
Instead of depending on the chalk line, your roofer will need to utilize an adjustable level to guarantee that the gutters are put at the proper angle.
2. Gutter Brackets at the Bottom
Your gutters must now be realigned with the chalk line by an expert. The majority of brackets are screwed or nailed into the fascia or wall beneath the gutter system. As a result, they will gently pry out nails with a hammer or pry bar or remove screws with a drill. They will relocate the bracket and reattach it to the fascia once it is free. The whole system should be in line with the chalk line at the completion of this procedure.
3. Examine Your Gutter Boot
Because most gutter boots do not reach the ground, yours should be able to lower 5/8 of an inch. If your boot is already on the ground, the expert may need to reduce the downspout to accommodate it. They will simply remove the boot, cut the downspout, and replace it. Before reattaching the boot, they will need to caulk around the downspout.
Sagging Gutters Repair
Another key structural issue is sagging gutters. If your gutters are drooping, they may not be able to withstand the elements and must be replaced. If you aren't ready to replace them, you may repair drooping gutters or hire an expert to do it for you.
How to Repair Sagging Gutters
1. Select a New Bracket. To support the sagging section, you will need to acquire a new gutter bracket. Wrap-around brackets are more supportive than hanger-style brackets and should be used wherever feasible.
2. Gutter Repositioning - Unscrew the old bracket from the fascia, then adjust the gutter to its appropriate height.
3. Brackets are used to secure the item. Screw the bracket into the wall at the right height to support the drooping part.
How Can You Keep Your Gutters From Freezing?
The primary strategy to protect gutters from freezing and contributing to ice dams is to address the underlying problem of attic insulation. To do so, you'll need to visit a roofing specialist to determine what your roof and attic need to avoid ice dams and minimize their damage.
Other methods for keeping gutters from freezing include:
After a severe snowstorm, hire a professional to remove snow from your roof.
Make sure your gutters are appropriately slanted.
Install gutter and roof heating wires.
You may be asking, what about gutter guards? Do they keep gutters from freezing?
Do Gutter Guards Prevent Ice Dams?

Gutter guards may help avoid gutter blockages, which can cause or contribute to ice dams. However, gutter guards will not assist if your roof is generating ice dams due to inadequate attic insulation, a big eave, or another problem. In fact, cleaning ice from gutter guards may be more difficult than cleaning ice from gutters without protection.
Should Gutter Guards Be Removed in the Winter?
If your property is prone to ice dams, particularly in the susceptible roof valley, you may want to delay installing gutter guards until the underlying problems have been addressed. You might remove the gutter guards once a year to prevent the hassle of scraping ice out of them. However, it would be a lot of labor and would not prevent any ice formation. Instead, you'd be sweeping ice off unprotected gutters.

How Do I Install Roof and Gutter Heating Cables?

Instead of removing your gutter guards, add gutter and roof heating wires for better results. However, since they need you to stand on the roof, which is very unsafe for any homeowner to accomplish, they should always be installed by specialists.
How Do You Remove Ice Dams From Gutters?
Ice dams are sometimes unavoidable, particularly under blizzard conditions. If your preventive measures fail and your gutters and roof form an ice dam, you will typically need professional assistance to remove the ice dam. However, there are a few safe techniques to begin addressing tiny ice dams on your own. Before attempting these approaches, please speak with a professional roofer.
With that in mind, here's how to remove ice blockages from gutters:
1. Turn on the hot water.
This procedure requires a lot of water, yet it works without causing damage to your roof. Starting at the top and working your way down, use your garden hose to provide hot water to the ice dam. If you begin at the bottom, you risk breaking the ice dam and causing it to tumble down, maybe injuring someone.
2. Avoid Destructive Techniques
Never use an axe or ice pick to damage your roof or gutters unless you want to repair them in the spring. Likewise, blow torches and other sources of flame may do significant damage to gutters and shingles. Even in the dead of winter, a direct flame may ignite the timber components of your roof. Also, do not sprinkle salt on your roof since it may cause rotting or rusting of the gutters and may harm your landscape.
If you've exhausted all safe techniques of ice dam removal, you should seek expert assistance.
The Importance of Winter Gutter Maintenance
Maintaining and cleaning your gutters before winter reduces your chances of producing an ice blockage. You also save the trouble of removing the ice dam and inspecting the roof for damage in the spring.
Guttering is not necessarily the underlying cause of an ice dam. If your roof often generates ice dams, you should consult with a roofing specialist to learn what else you can do to avoid ice dams and safeguard the longevity of your roof. You may need to replace your attic insulation or add extra ice and water protection.